SSO and Auto-Provisioning
Register your SSO org identifiers in Canopy so matching users are provisioned automatically, enforce SSO sign-in, and manage the provisioned-user and deny lists.
Overview
Section titled “Overview”Auto-provisioning registers a customer’s single sign-on (SSO) organization identifier so that matching users are created in Synthreo automatically the first time they sign in. You can also enforce SSO, so matching users must sign in through their provider rather than with a password.
These controls appear in two places, and work the same in both:
- Your organization - in Settings, under “SSO and Auto-Provisioning” and “SSO Access”.
- A child customer - on the customer’s SSO / Provisioning and SSO Access tabs. See Adding a New Customer.
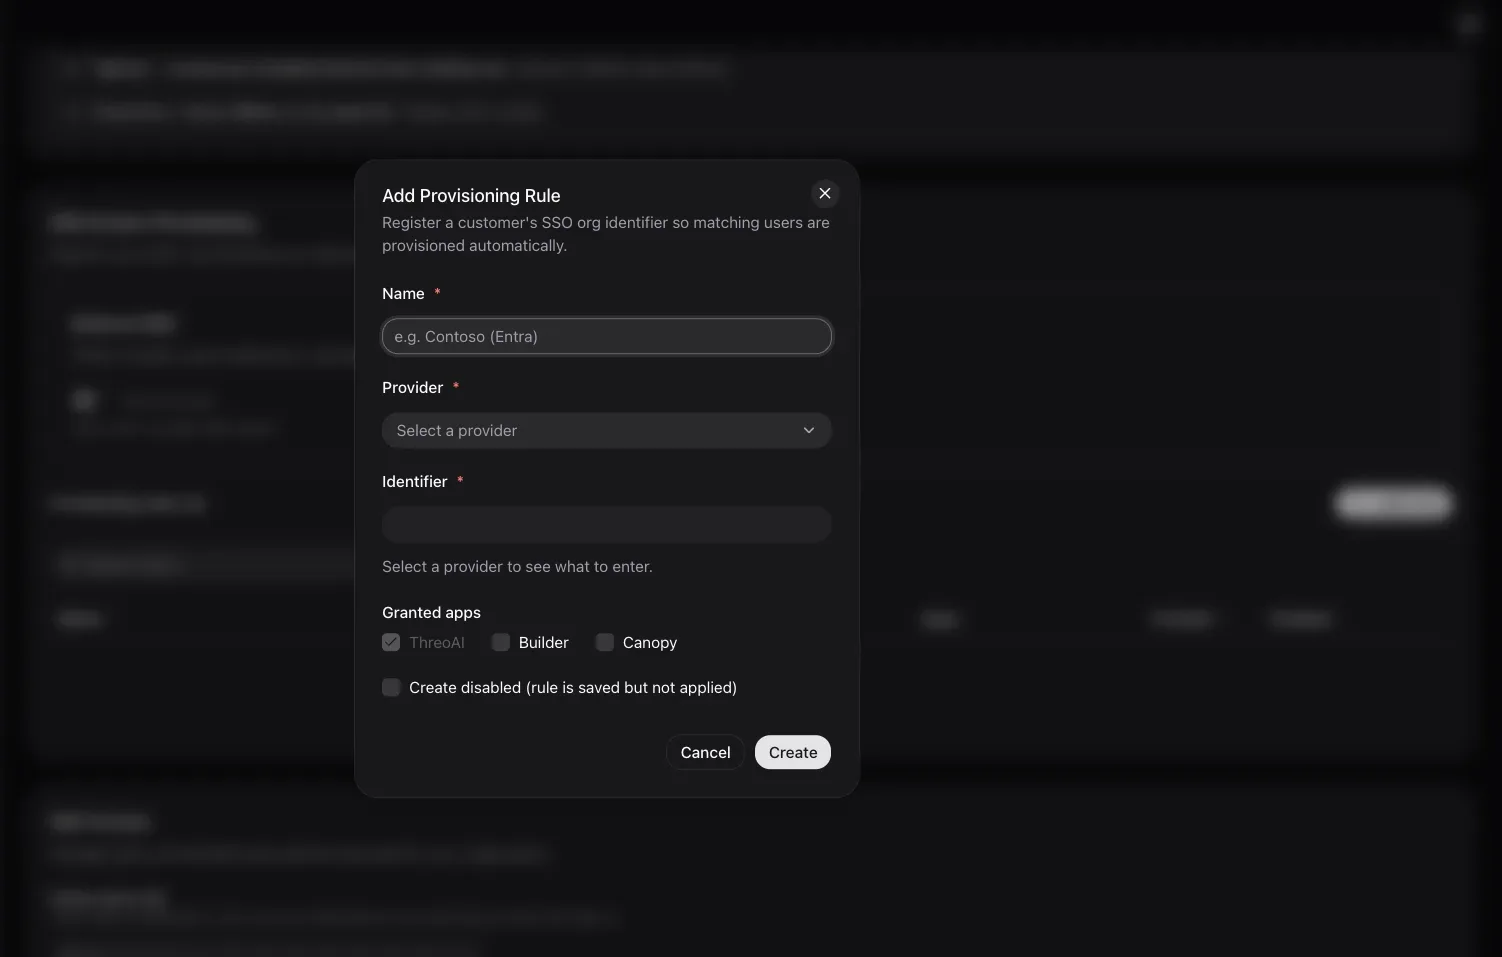
Provisioning rules
Section titled “Provisioning rules”A provisioning rule maps an SSO organization to your Synthreo tenant. Select Add rule and fill in the dialog:
| Field | What to enter |
|---|---|
| Name | A label for the rule (for example, “Contoso (Entra)”). |
| Provider | The SSO provider. Microsoft (Entra) is supported. |
| Identifier | The provider’s organization identifier. For Microsoft, this is the Directory (tenant) ID - the GUID shown under Microsoft Entra ID in the Azure portal (for example, 00000000-0000-0000-0000-000000000000). |
| Granted apps | Which apps provisioned users receive. ThreoAI is always included; Builder and Canopy are optional. |
| Create disabled | Save the rule without applying it yet. |
Select Create to save. Rules appear in the table with their name, provider, identifier, granted apps, created date, and enabled state.
Enforcing SSO
Section titled “Enforcing SSO”The Enforce SSO toggle stays off, and cannot be turned on, until at least one provisioning rule exists. Once a rule is in place, turn it on so that users matching a rule must sign in through their SSO provider.
SSO Access
Section titled “SSO Access”The SSO Access view manages the users that auto-provisioning has created and the ones you want to keep out:
- Active users - users auto-provisioned for this organization, with their email, provider, identifier, and when they were provisioned. Deny a user to block re-provisioning on their next sign-in.
- Denied emails - the block list. Block email adds an address; the list shows when each was blocked and why. Allowing an email re-enables provisioning on that person’s next sign-in.
Related
Section titled “Related”- Settings - where your organization’s SSO settings live
- Adding a New Customer - the per-customer SSO tabs
- Managing User Permissions - roles and access for provisioned users