Starting a Chat in ThreoAI
Start a conversation in ThreoAI - use the composer, pick a model, turn on Wingtip agent mode, attach files, use quick-action chips, and manage your chat history.
Overview
Section titled “Overview”Chatting in ThreoAI works like any AI chat tool - type a message, press Enter, and the AI answers. What sets ThreoAI apart is that the models you can pick are curated by your organization, so they meet your company’s security and compliance rules.
This guide covers the composer, picking a model, Wingtip agent mode, attaching files, the quick-action chips, and keeping your chat history tidy.
Starting a new chat
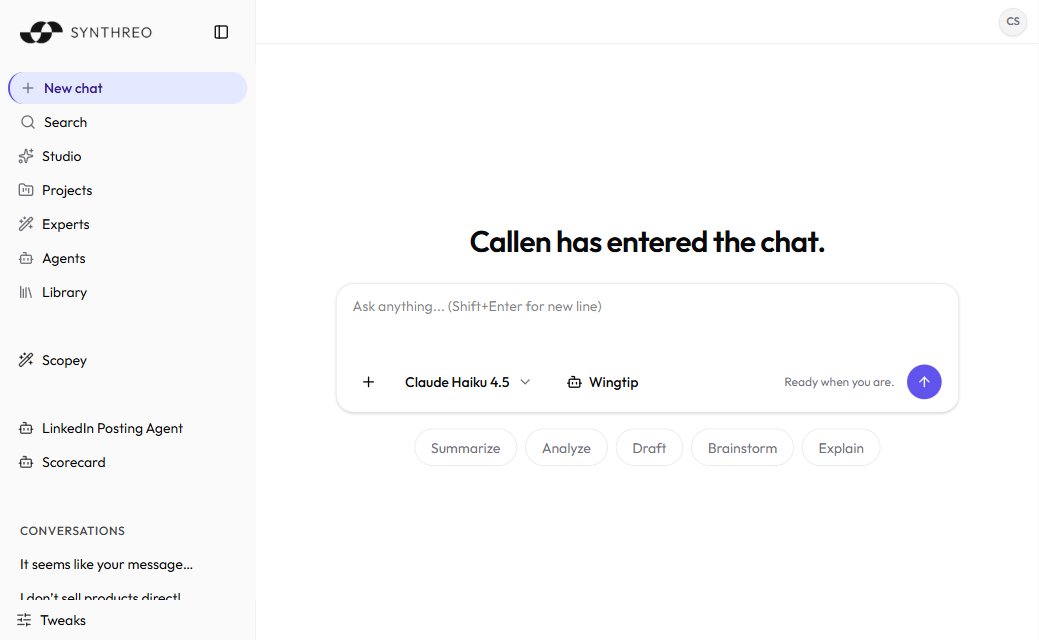
Section titled “Starting a new chat”To begin a fresh conversation, select New chat at the top of the left sidebar. Each new chat lands in your general chat history.
When the home screen opens, it greets you with “Hey
- Type your message in the composer.
- Press Enter to send. The AI starts answering right away.
Press Shift + Enter to drop in a line break without sending - useful for a multi-line prompt, structured instructions, or formatting your message before it goes out.
Tip: The answer is only as good as the prompt. Be specific. Instead of “help me with this,” try “summarize the three main arguments in this document and list the supporting evidence for each.”
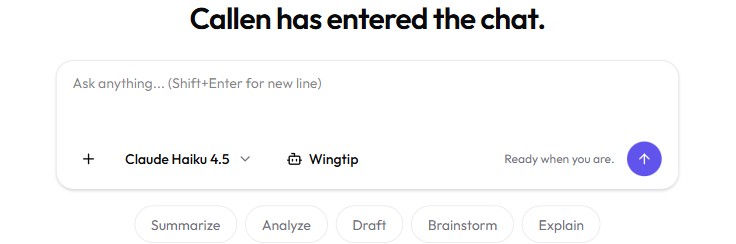
The composer
Section titled “The composer”The composer is the input bar at the bottom of the screen. It holds everything you need to shape a message before you send it:
| Control | What it does |
|---|---|
| Model selector | Shows the current model and lets you switch. Capability badges here tell you what each model can do - see Tools and Capabilities. |
| Wingtip toggle | Switches the chat into agent mode (where enabled) so ThreoAI can take multi-step actions on your behalf. |
| Attachment control | Adds files for the AI to read and analyze. |
| Quick-action chips | One-tap starters - Summarize, Analyze, Draft, Brainstorm, Explain - that prefill a common kind of request. |
Picking a model
Section titled “Picking a model”The model selector in the composer shows the active model for the conversation (for example, a GPT, Claude, or Grok model). Open it to see every model available to you and switch with a tap - the change takes effect on your next message.
Each model in the list carries capability badges for what it can do, such as web search, image generation, or reasoning. Use those badges to pick a model that fits the task. The badges and the built-in tools behind them are covered in Tools and Capabilities.
The models you see are configured by your organization’s administrator in Canopy. Different models have different strengths - some are stronger at creative writing, others at technical analysis or following complex instructions. If a model you need is missing, ask your admin to enable it.
Setting a default model
Section titled “Setting a default model”If you keep switching to the same model, set a default model in your Profile Settings so every new chat starts there:
- Open Profile from your account menu.
- On the General tab, find the Default Model dropdown.
- Pick the model you want by default.
- Select Save.
You can still switch models in any conversation; the default only sets the starting model for a new chat. Leave it empty and ThreoAI falls back to your organization’s default.
Quick-action chips
Section titled “Quick-action chips”Below the composer you will find quick-action chips - Summarize, Analyze, Draft, Brainstorm, Explain. Tap one to prefill a common kind of request, then add your own detail before sending. They are a fast way to get going when you are not sure how to phrase a prompt.
Wingtip agent mode
Section titled “Wingtip agent mode”The Wingtip toggle turns a normal chat into an agent session, where ThreoAI can plan and carry out multi-step work for you rather than just answering. Wingtip is available where your organization has enabled it; if you do not see the toggle, it is turned off for your tenant.
Attaching files
Section titled “Attaching files”Use the attachment control in the composer to bring files into the conversation for the AI to read and analyze. This works in any chat - the home chat, a Project, or an Expert.
- Select the attachment control in the composer.
- Choose one or more files from your device.
- The files appear as thumbnails above the composer.
- Type what you want done with them, then press Enter.
Supported types include PDF, DOCX, PPTX, XLSX, TXT, CSV, and images. For the full rundown, see Uploading and Working with Files.
Chatting with an Expert or Agent
Section titled “Chatting with an Expert or Agent”An Expert is a reusable assistant set up with its own instructions, knowledge, and actions. An Agent is an autonomous Builder agent you can run from chat. Both behave like a normal conversation, just pre-configured for a job.
- Experts live under Experts in the sidebar and in Studio. Open one and start chatting. See Using an Expert.
- Agents live under Agents in the sidebar. Pick one to start a conversation.
If an Expert or Agent has prompt starters set by its creator, they show up as suggested first messages - select one to send it, or type your own.
Managing your chat history
Section titled “Managing your chat history”Conversations save automatically the moment you send your first message. Nothing to save by hand - your history is kept and reachable from the left sidebar.
Finding past conversations
Section titled “Finding past conversations”Earlier chats are listed in the sidebar, newest first. Scroll to find one, or use Search in the sidebar to look one up by keyword.
Renaming a conversation
Section titled “Renaming a conversation”ThreoAI names each conversation from its content. To rename one:
- Hover the conversation in the sidebar to reveal the … menu.
- Select …, then Rename.
- Type a new name and confirm.
Deleting a conversation
Section titled “Deleting a conversation”- Hover the conversation in the sidebar to reveal the … menu.
- Select …, then Delete.
- Confirm when prompted.
Note: Deleting a conversation is permanent.
Organizing with Projects
Section titled “Organizing with Projects”If your history is getting long, use Projects to group related chats into their own workspace. Conversations inside a project stay out of your general history, which keeps the sidebar focused.
Tips for better conversations
Section titled “Tips for better conversations”- Be specific. More detail means a better-aimed answer. Instead of “write an email,” try “write a professional email to a client explaining that their project deadline has moved out two weeks.”
- Give context. If the AI needs background to answer well, include it: “I’m an IT support specialist. A user says Outlook keeps crashing after the latest Windows update. What troubleshooting steps should I suggest?”
- Break big tasks into steps. For multi-part requests, take one part at a time.
- Use follow-ups. If the first answer misses, refine it: “Make that more concise” or “Focus on the cost comparison.”
- Set your personal context. Fill in your Profile Settings with your role and preferences so answers come back more relevant without you repeating yourself.
Related
Section titled “Related”- Navigating the Interface - full interface reference
- Tools and Capabilities - built-in tools and what each model can do
- Uploading and Working with Files - attach documents to a conversation
- AI Model Comparison - run one prompt against two models
- Projects - group conversations into workspaces
- Using an Expert - find and use a reusable assistant
- Profile Settings - set your default model and personalize your experience